Replacing old chalkboards with new whiteboards (or new chalkboard surfaces) is no easy task. It is important to know what options are available before you begin.
 Many people assume board replacement is fairly straight forward – take the old chalkboard off the wall, and install the new whiteboard. There are a few things to keep in mind before going forward.
Standard size whiteboards are usually about 8 inches shorter top to bottom than most existing chalkboards. This height difference can create significantly more work than anticipated, the least of which includes patching and painting where the old mounting brackets were. If the existing writing surface is slate, taking the old board off the wall might create other problems such as disposal of the materials. Most old chalkboards were glued to the wall with “blobs” of very strong contact cement. These will need to be chiseled and hammered flat for a proper and plumb installation of the whiteboard.
So what are the options?
Begin by measuring the existing chalkboards. Most existing chalkboards are roughly 54″ top to bottom, including the frame. However, new whiteboards are usually only 48″ high, including the frame. You may opt not to remove the existing chalkboards, since the wall that will not be covered by the smaller whiteboard will need to be patched, painted and refinished.
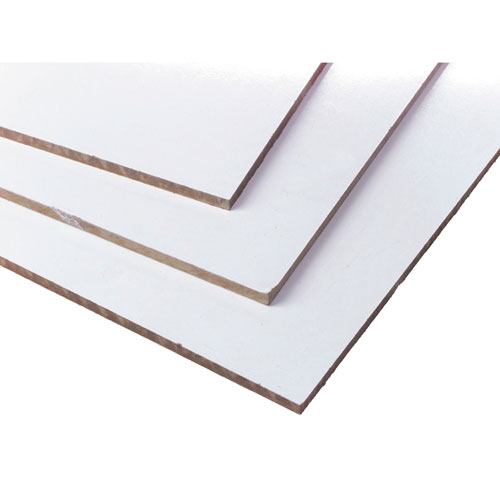
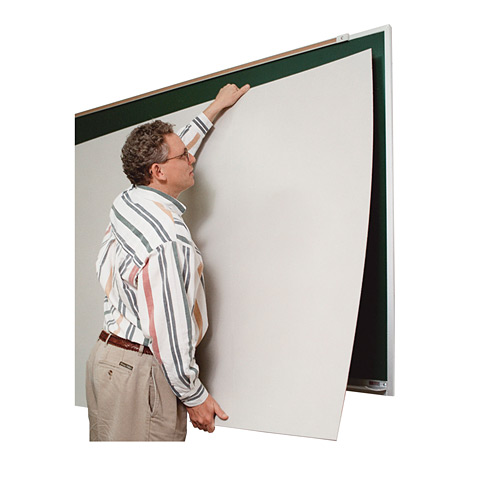
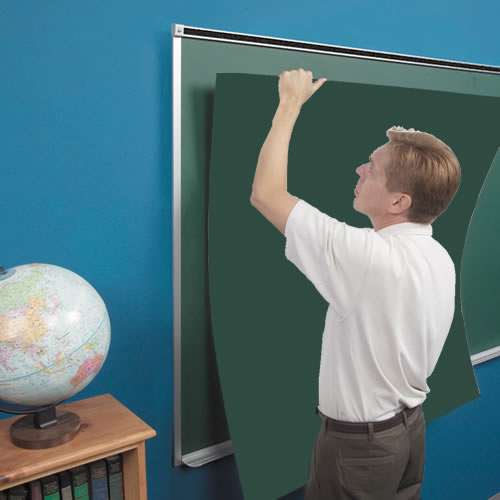
One option, which does not involve removing the old chalkboard, is installation of new porcelain whiteboard skins. You should consider hiring a professional to do this. Porcelain whiteboard skins are razor sharp and very unwieldy. Installation requires special tools and the old chalkboard must be treated and cleaned thoroughly in order to accept the new contact cement. If the glue is not applied correctly there will be unsightly bubbles and imperfections that cannot be removed. When done correctly, this will give you the best and most complete look for your classroom without all of the mess. It is not an inexpensive project, but the porcelain skin can be cut to precisely to fit your existing chalkboard. Since many older chalkboards came with site installed snap-on trim, the trim can be easily removed and snapped back on once the skin replacement is complete.

Please keep in mind that if the chalkboard surface you are applying the new skin to isn’t flat, the new skin will only be as smooth as the surface you are applying it to. However, the advantages that come with this approach is the cleanliness of the process, there is no patching and painting and you will not need to dispose of the old board. If this is a viable option, I strongly recommend you hire a professional who has done this many times before.
Another option is a framed whiteboard mounted over the existing chalkboard. These whiteboards are designed without a tray and some even come with pre-drilled, counter sunk holes to help secure the whiteboard over the existing chalkboard. This is the simplest option, and is a project that almost anyone can do. It doesn’t require taking off any trim, it doesn’t require precision mounting and you don’t need to remove the existing chalkboard. The main drawback is the loss of available writing surface. If the board is mounted over the existing chalkboard and frame you will have just about the same amount of writing surface as you did with the chalkboard. If you need to mount the new whiteboard within the chalkboard frame, like a replacement window, you will lose roughly 3 inches on the height and width respectively.
Personally, I recommend this option for most installations. However, consider how the installation is going to work if the existing chalkboard does not have a flush frame around it (see the usmarkerboard.com website for measuring instructions). If the old chalkboard has snap-on trim – which generally has a ¼” reveal – you must install the new whiteboard within the chalkboard frame, essentially creating a double frame. Otherwise, you will not have a flush surface in which to mount your new whiteboard. So before ordering this type of board, please get some guidance on how to properly measure the board to ensure the easiest installation.
The final option and my least favorite is a “wallpaper-like” product. It glues over the existing chalkboard to create a dry erase writing surface. However, it is only as good as the installer who hangs it and will only last as long as the maintenance put into it. Over time this product will ghost and you will be unable to wipe clean. Some of the newer versions of this product have “magnet acceptable” capabilities. This product has a porous surface and will ghost with regular use. This a temporary solution at best for most institutional use.
So before you place an order for new whiteboards, make sure you plan the installation first. Keep in mind that older chalkboards have 48″ of vertical writing surface, and new whiteboards are 48″ high including the frame. Then, choose the best replacement option for your individual situation: completely remove the existing; install whiteboard skins; replacement whiteboards with frames mounted over the existing chalkboard; or wallpaper-like products.

Check out our other blog post about IdeaPaint for another option!